By
TheUltimateNoob
Greetings 420 fam
So as promised, here it is.
For anyone that's growing and hand-watering their plants, this is for you guys. This is a simple project that I've completed in minimal time while sitting at home trying to make life easier, lol.
For those who want one, but don't have the resources or time to make their own, I am willing to make the kits by order (excluding the container) and make them available for purchase in the classifieds section - which is why I've decided to exclude the pricing list. They will be cheap though, no worries.
I hope you guys understand, just trying to make some extra moola during this lockdown.
Anyway, enough of that. Let's get into it
What you will need:
- 5mm PVC tubing (I got 3m to be safe but it can be done with a shorter length of tubing)
- An adequately durable and sharp scissor
- 5 x 5mm screw/barb adapters
- 1 x 5mm micro tee
- 1 x 5mm micro choke
- 2 x 5mm regular adapters
- 1 x 10L plastic container w/tap
- Hot glue gun (we gonna use a really small amount of glue)
- at least 2 x small cable tie straps
Now that we've got that out of the way, here's the build.
Creating The Main Ring
- At the base of your tree, use an end of the PVC tubing and hold it in a loop around the main stem, creating a circle of the diameter you would like. Use the scissor to cut the desired length of tubing.
- Insert the micro tee into an end of the tubing and close the loop
Making it into a Drip Ring
- Cut out/poke 5 holes spaced out well on 1 side of the tubing that are slightly smaller than the diameter of the screw/barb.
- Shorten the screw side of the screw/barb adapter so that it doesn't damage the opposite inner wall of the tubing once it's screwed in securely.
- Use the screw side of the adapter and try to push it into the gap you've created while you rotate the adapter to catch thread. Screw the adapter in until the plastic base is flush with the tubing. Do this for all the holes you created.
The plumbing
- Cut a length of tubing a bit longer than the distance from the center of where your pot will be to the corner of your tent.
- Connect one end of the tubing to the choke valve and the other end to the micro tee on the drip ring you've just created.
- Cut a length of tubing long enough to reach where you're going to place your container/res.
- Attach one end f this tube to the free end of the choke valve.
The installation
- Use one of the cable tie's to secure the tubing to the grow tent pipe slightly higher than the level of the drip ring on the soil.
- Strap another cable tie just above that, securing the choke valve and holding the tubing much more securely.
- Open one end of the drip ring and place it around the base of your plant than reconnect the tubing. You can face the drippers upwards or into the soil, I went with upwards so i can notice any flow issues.
We're almost there! Just a few things left.
The Res
I know this isn't a traditional res in growing terms, but its function is definitive.
- Cut one side of the regular adapters off at the base as shown below.
- Place the modified adapter at the outlet of the tap as shown and hot glue it into place effectively, not leaving any gaps. This is so that your precious nutes don't drip all over the floor once you open the tap.
*Be careful not to cover the barb of the adapter that's sticking out with glue or else you will have trouble with the next step*
- Cut off a short length from the free end of the PVC tubing and attach a regular adapter to one end, then attach this piece to the adapter sticking out of the tap.
- Mix your nutes, fill the res (please make sure the tap is closed, lol) and place it somewhere higher than the choke valve.
- Attach the free end of the PVC tubing to the adapter pipe on the res (this is the pipe and point at which you will connect and disconnect when using and storing the system to prevent breaking the tap adapter).
*The higher you have the res, the more force the water will flow with*
Adjust your flow
- Open the choke valve the so that it barely lets anything through, then open the tap on your res (open the res tap slowly to prevent anything blowing out due to the sudden change in pressure) *Check For Leaks At This Step*
- Adjust the choke until the nutrient mix has a slow, steady flow out of all the nozzles. This is subjective though so set it however suits you the best.
Just like that... Boom, your very own semi-automatic watering system.
The only issue with this prototype design is that the res doesn't completely empty due to its shape (a major part of the reason I'm leaving it out of the kit), but there are ways to solve this. I plan to make a commercial version available once I find a decent shaped res with a siphon pipe to ease flow and empty the res.
I'm also in the process of designing another (pressurized) system so the res can be kept on the floor along with some other improvements.
Send me a private message for any questions or orders.


 By Johnsmithled
 By Stinger96
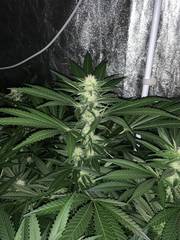
 By Psylecta
 By TheUltimateNoob
Recommended Posts
Join the conversation
You can post now and register later. If you have an account, sign in now to post with your account.